クイックスタート
ここでは Angular 版「Hello, world」を実際に作り、Angular で作成したウェブアプリケーションを実行してみましょう。
環境設定がまだできていない人は、「Angular の開発環境」を先にみてください。
それでは、はじめましょう。
まず、ここで実行する環境は Ubuntu (16.04 LTS) です。作業ディレクトリは ~/src/test/angular としています。
Angular プロジェクトの作成
Angular のプロジェクトを作成するには、次のコマンドを実行します。
$ ng new <プロジェクト名>
今回はプロジェクト名を helloworld とします。コマンドを実行し、次のように「プロジェクト 'helloworld' が正しく作成されました」と表示されれば成功です。
$ ng new helloworld
installing ng
  create .editorconfig
  create README.md
  create src/app/app.component.css
  create src/app/app.component.html
  create src/app/app.component.spec.ts
  create src/app/app.component.ts
  ...
  create package.json
  create protractor.conf.js
  create tsconfig.json
  create tslint.json
Successfully initialized git.
Installing packages for tooling via npm.
Installed packages for tooling via npm.
Project 'helloworld' successfully created.
$
さて、プロジェクトを作成したら、早速デフォルトで作成されたコードを実行してみましょう。
まず、上記で作成されたサブディレクトリ helloworld に移動します。
$ cd helloworld
次のコマンドで開発サーバーを実行します。
$ ng serve
成功すると次のように表示され、localhost のポート 4200番で開発サーバーが実行されたことがわかります。
$ ng serve
** NG Live Development Server is running on http://localhost:4200 **
 10% building modules 0/1 modules 1 active ...c/test/angular/helloworld/src/main
 10% building modules 1/2 modules 1 active ...t/angular/helloworld/src/polyfills
 10% building modules 2/3 modules 1 active ...est/angular/helloworld/src/styles.
 10% building modules 3/4 modules 1 active ...client/index.js?http://localhost:4
 ...
 39% building modules 244/245 modules 1 active
 ...r/helloworld/node_modules/ms/iHash: d04a0cb13cef816c9961

Time: 8943ms
chunk    {0} polyfills.bundle.js, polyfills.bundle.js.map (polyfills) 158 kB {4} [initial] [rendered]
chunk    {1} main.bundle.js, main.bundle.js.map (main) 3.62 kB {3} [initial] [rendered]
chunk    {2} styles.bundle.js, styles.bundle.js.map (styles) 9.77 kB {4} [initial] [rendered]
chunk    {3} vendor.bundle.js, vendor.bundle.js.map (vendor) 2.37 MB [initial] [rendered]
chunk    {4} inline.bundle.js, inline.bundle.js.map (inline) 0 bytes [entry] [rendered]
webpack: Compiled successfully.
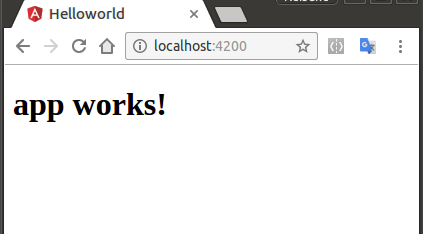
ブラウザから http://localhost:4200 を要求すると、次の画面が表示されます。

何ともシンプルな画面ですが、これこそ今作った Angular ウェブアプリケーションです。
まとめると、次の通りです。
- 新規プロジェクトの作成
ng new <プロジェクト名> - 開発サーバーの開始
ng serve
